So far we have created our Delta PARQUET files in the Delta Lake using Notebooks with Pyspark.
We have created a Semantic Model – Storage mode Direct Lake in fabric
Its time to create some visuals. but the question is. Do we create them in Fabric. or in a bpix file?
Reporting Fabric or Pbix File?
Fabric – Centrally managed
Pbix – offline Development and version controlling available for the files with .pbip (Project file)
For this project we are going to go for the hybrid approach. The semantic model in Fabric. And reports developed in Desktop with Devops Version controlling which are published into Fabric.
This gives us better opportunities for version control and collaboration.
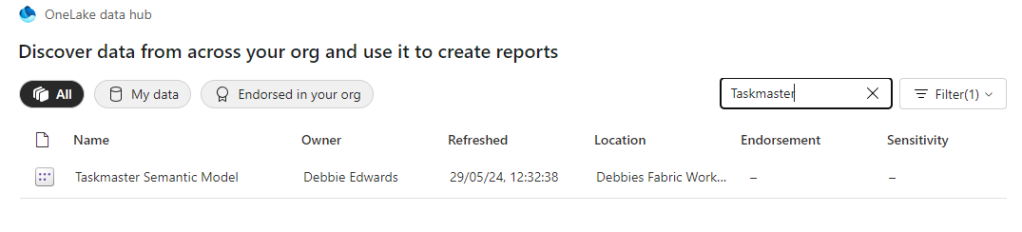
Get Data
In Power BI Desktop

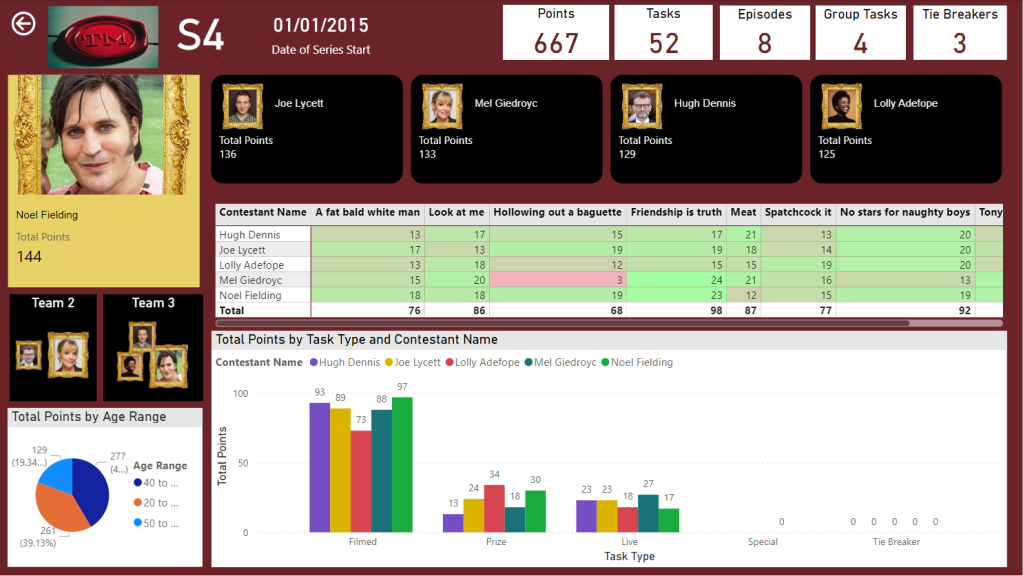
Power BI Reporting
Our front end reporting wont be gone into too much detail here. We are more interested in other areas of Fabric. So here are the basic pages

Drill through to Series

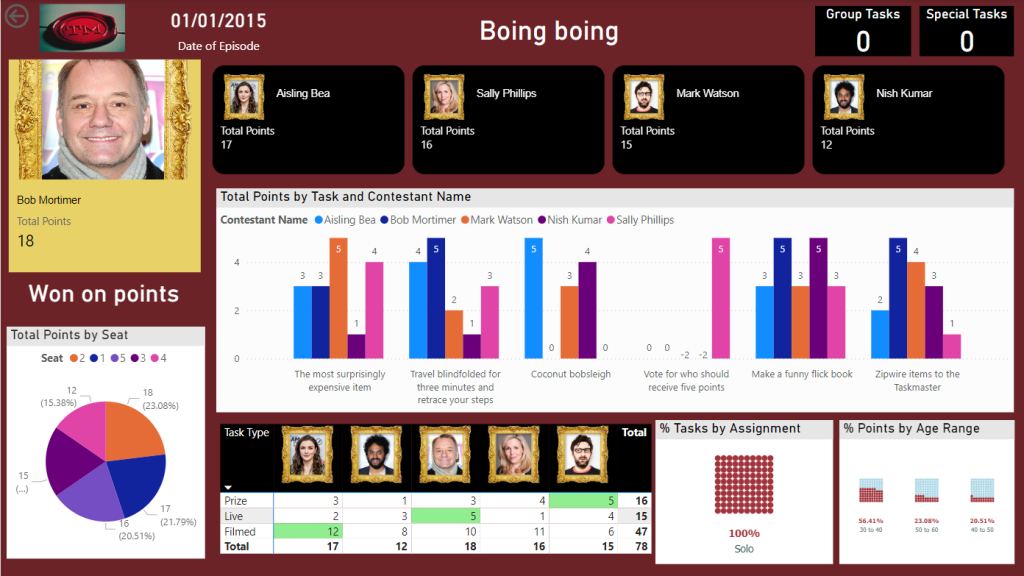
And Drill through to Episode

We now have a pbix Report we can publish through to our Fabric Workspace
Create the Power BI Project (PBIP)
Instead of simply saving as a pbix (black box) file, lets save as a project file instead and see how this can really change how we work with others in Power BI. We should see benefits like:
- Items are stored in JSON format instead of being unreadable in one file
- JSON text files are readable and contain the semantic model and report meta data
- Source Control. Finally real source control for Power BI
- Amendable by more than one person at a time?
- The possibility of using (CI/CD) Continuous Integration and Continuous Delivery with Power BI
Saving as a project is in preview so lets turn it on.
Options and Settings / Options

TMDL
This was mentioned in the Power BI June 2024 Updates.
TMDL is the improvement to PBIP as the semantic model file format for the Power BI Project files.
Our Semantic model has been created within Fabric. we might look at this in more detail later.
And now we can Save as


And we can see that its a project in the title.
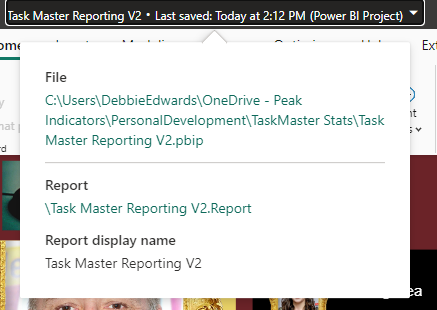
Clicking on the title shows us file paths of the objects. we only have the report because the semantic model has been created within Fabric.
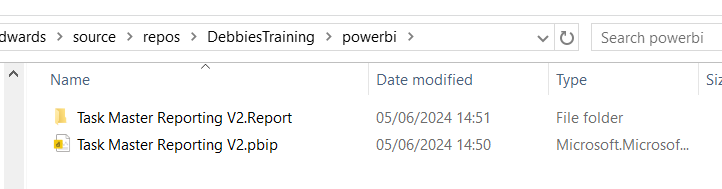
Lets have a look at what we have created in Explorer

The main project file

The reporting folder

Our objects within the reporting folder.
Currently this is in One Drive. We want to get this added into Devops and GIT so it can be added into our full source control process along with all the Fabric code.
Azure DevOps build pipelines for continuous integration
First of all we need to make sure Fabric is connected to Azure Devops which it is

And cloned to a local drive. This was done using Visual Studio but there are other ways you can clone.
It would have been better to have saved into this cloned local project, But we can create a folder and move instead.

Created a Power BI Folder.
And Moved all the objects mentioned above into this folder
Its in local but not yet in the cloud.
I have installed Git Bash to work with https://git-scm.com/downloads
In GIT Bash I change directory to the correct GIT Directory (Local) and us ls to list the information in there
cd source/repos/DebbiesTraininglsgit status
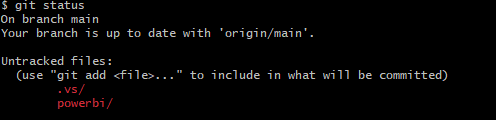
We can see we have powerbi code that is uncommitted and needs pushing to the central GIT repository.

We don’t really want to work on the main branch. A better cleaner process is to create a feature branch. InitialPowerBIFile
git add .
The . in git add . is a wildcard that represents all files and directories. basically telling GIT to stage all changes.
git add powerbi
just adds the power BI folder. We dont really want to do anything with fabric as this is taken care of already.
git commit -m "InitialPowerBIFile"
-m flag is allowing you to provide a commit message in the command. And our command is committing changes
So far we have added the files to the staging area and committed them. Time to Push to the cloud
git push --set-upstream origin InitialPowerBIFileYou will initially get a log in screen to authenticate the push

And this is the line you want to see. We know that we have pushed it to devops
Back in DevOps

Remember to change to the correct branch. You wont see it in Main.
We can see the Power BI Items.
Create a Pull Request


Very simple. We are in Dev and don’t have any reviewers or work on Boards to connect to
Create and Complete

Power BI Files are now in Main
How do you now work with the power BI Project file?
Open the project file from your local source control
lets create a new quick report page for Demographics

And save
Back to GIT
git checkout -b "InitialPowerBIFileAllDemographicsPowerBIPage"

git status

We can see we have modificationsgit add .
git commit -m "InitialPowerBIFileAllDemographicsPowerBIPage"
git push --set-upstream origin InitialPowerBIFileAllDemographicsPowerBIPage
Back in Devops


Create and Complete merge. (If you don’t use the reviewing process in Development)

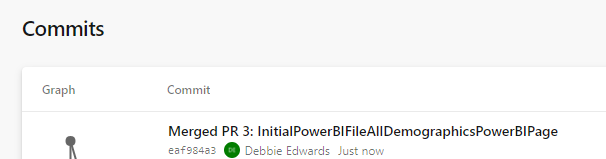


We can see the page is in with lots of work added into this part of the JSON script.
Where is the Semantic Model?
The Semantic model has been created in Fabric.

It says synced on GIT Status.

And here is is in Devops.

Conclusion
The above can be done in Power BI Pro as well as Fabric. Which is good news.
However, my worry about this is that someone creating Pbix Reporting won’t take to the whole GIT process. I suspect that when it comes down to it, it simply wont be done properly.
If you were to go the pbix file route, this would need a lot of governance work to get people to use GIT. At Enterprise level this would be doable but I doubt this would become a real part of the process at self service level.
I did start to question the process. after doing some more reading. It feels like if you created the reporting inside of Fabric, The GIT Process would be simplified. Even though the documentation states that for full GIT control use PBIX. I will be really interested in creating a Power BI Report inside of Fabric to see how this would work in the process at some point.
In the next blogs we are going to look at some new features of Fabric. We can also look at using this feature along with with Devops Pipelines later. (Premium and Fabric only)